Customize Destiny rules: Google Workspace
You can customize rules for the Destiny Resource Manager Mobile Device Management (MDM) Integration feature.
To access the Destiny Resource Manager MDM integration homepage:
- Log in as a Destiny Administrator.
- Select Setup > Sites sub tab.
- Next to the district name, click the Edit icon,
 . The Edit District page appears.
 -
To enable the flow of data from Resource Manager to Google Workspace, under Resource Management, select the Synchronize with MDM checkbox.
-
Scroll to the top or bottom, and click Save.
- Under Resource Management, click Configure.
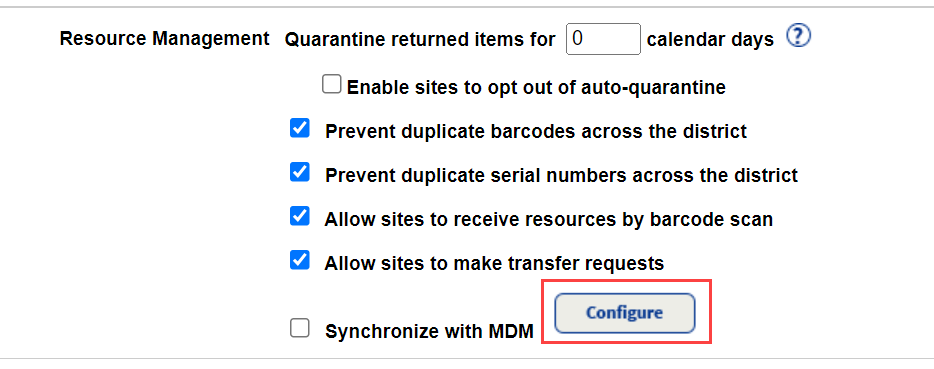
The Mobile Device Management integration homepage appears.
- At the top-right of the Mobile Device Management homepage, use the Account Setup drop-down to select your MDM.
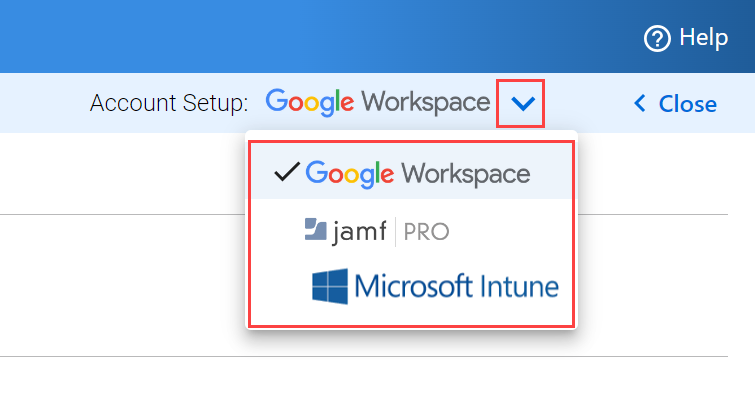
Note: Destiny will remember your MDM selection.
To enable update rules for Google Workspace to Destiny:
-
Next to Import & Sync Data, click Customize Destiny Rules. The Destiny & MDM Rules page appears.
-
Under Google Workspace to Destiny, select any of the following checkboxes:

- When Google Workspace has a Disable Event:
For... Check the box to mark the item's status as... Items that are checked out in Destiny - Lost
- Stolen
Items that are NOT checked out in Destiny, - Approved for Disposal
- Available for Parts
- In Use
- Loaned Out
- Lost
- No Longer in Use
- Out for Repairs
- Ready for Disposal
- Retired
- Returned to Vendor
- Stolen
- When Google Workspace has a Re-enable Event, you can select to Change the Not Checked Out item's Status in Destiny to Available by checking the box.
- When Google Workspace has a Deprovision Event:
If... Check the box to mark the Status as... You want to delete the item. Deleted.
The item is checked out in Destiny - Lost
- Stolen
The item is NOT checked out in Destiny - Approved for Disposal
- Available for Parts
- In Use
- Loaned Out
- Lost
- No Longer in Use
- Out for Repairs
- Ready for Disposal
- Retired
- Returned to Vendor
- Stolen
- When Google Workspace has a Disable Event:
- Under Destiny to Google Workspace, select any of the following checkboxes:

If Destiny... Check the box and... Changes the Status to Lost - Use the drop-down to set the status as:
- Don't Change
- Disabled
- Deprovisioned
- Click the edit icon to change the Organizational Unit.
Changes the Status to Stolen - Use the drop-down to set the status as:
- Don't Change
- Disabled
- Deprovisioned
- Click the edit icon to change the Organizational Unit.
Changes the Status to Available The item's status is changed to Active, and potentially moved to the previously mapped Organizational Unit. Changes the Site The item is moved to the new Mapped Site. Deletes an item Select the desired status from the drop-down, and click the edit icon to change the Organizational Unit. - Use the drop-down to set the status as:
- When you are done, do either of the following:
- To stop all changes, click Reset & Cancel.
- To save all changes, click Save Changes.
|
Notes:
|